New Project Wizard
Overview
The easiest way to create a PreEmptive Protection - DashO project is to use the New Project Wizard. The wizard examines your application and determines the settings to obfuscate your application. To start the wizard, go to File > Project Wizard.
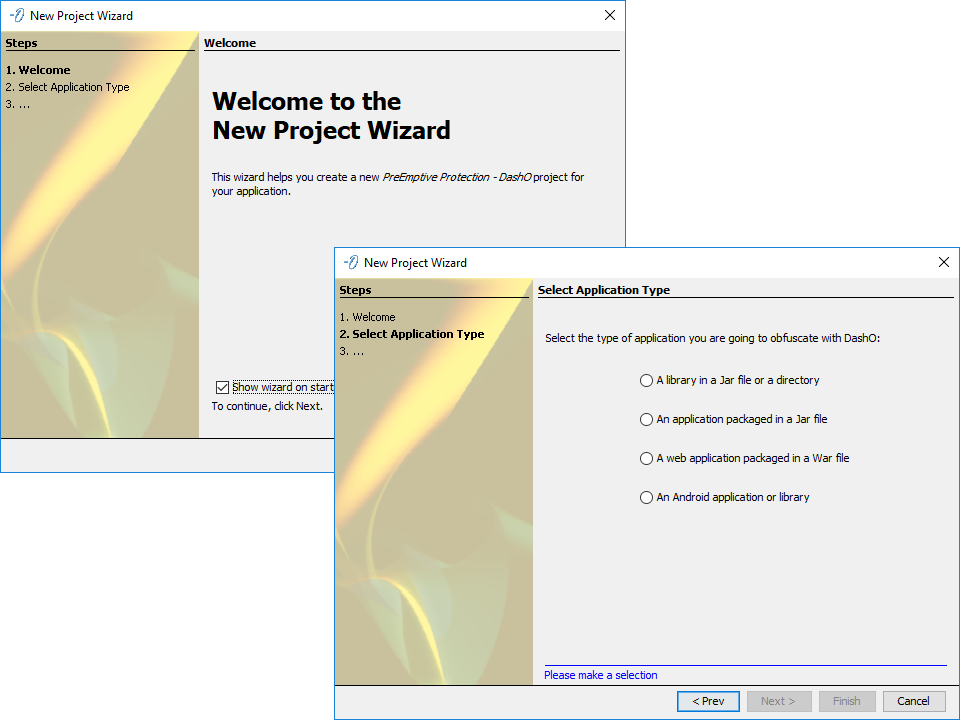
The first step in using the wizard is to characterize your application. Select the type that best describes your application.
Based on your selection the wizard will ask you a series of questions that are specific to your application type. When the wizard finishes, take a look at the Console for any issues which may have been encountered. The following sections show you how to use the wizard for each type of application.
Note:
By default, the New Project Wizard will automatically launch on startup.
Java Libraries
When you select a Java library to be obfuscated, the wizard will ask you for the location of the jar or directory that contains the library, as well as the location of the JDK that DashO should use to resolve Java runtime classes (See Include JDK).
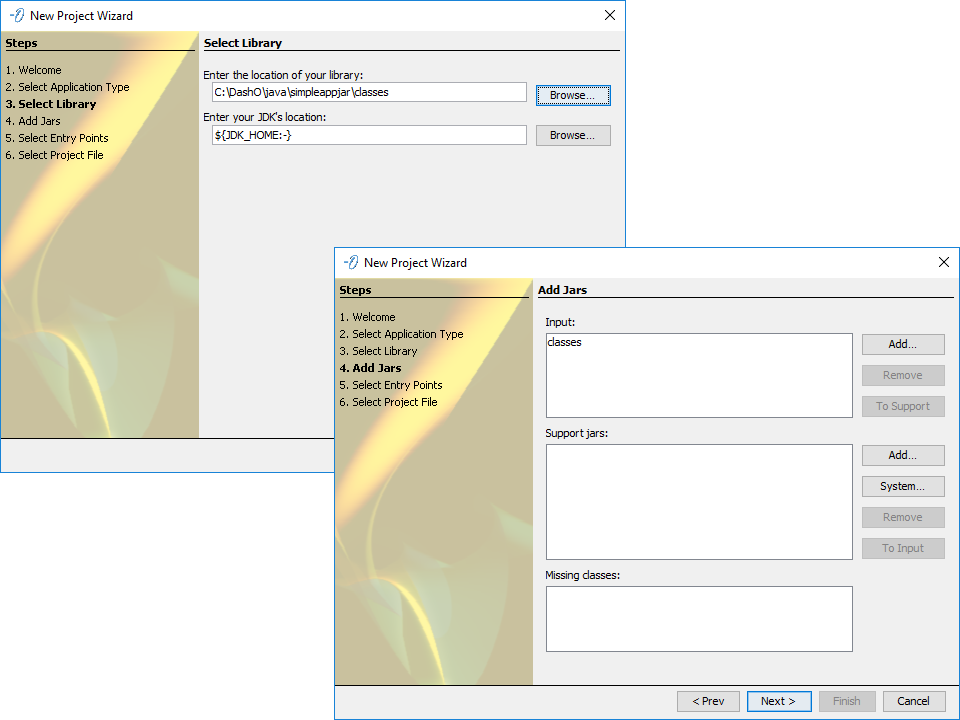
The wizard will examine the library and determine dependencies that will be needed at runtime or for obfuscation purposes.
You can add additional jars as input to be obfuscated or as runtime support jars.
Java modules (.jmod) can also be added to the list of support libraries.
The missing classes list shows classes that are referenced by your library but were not located.
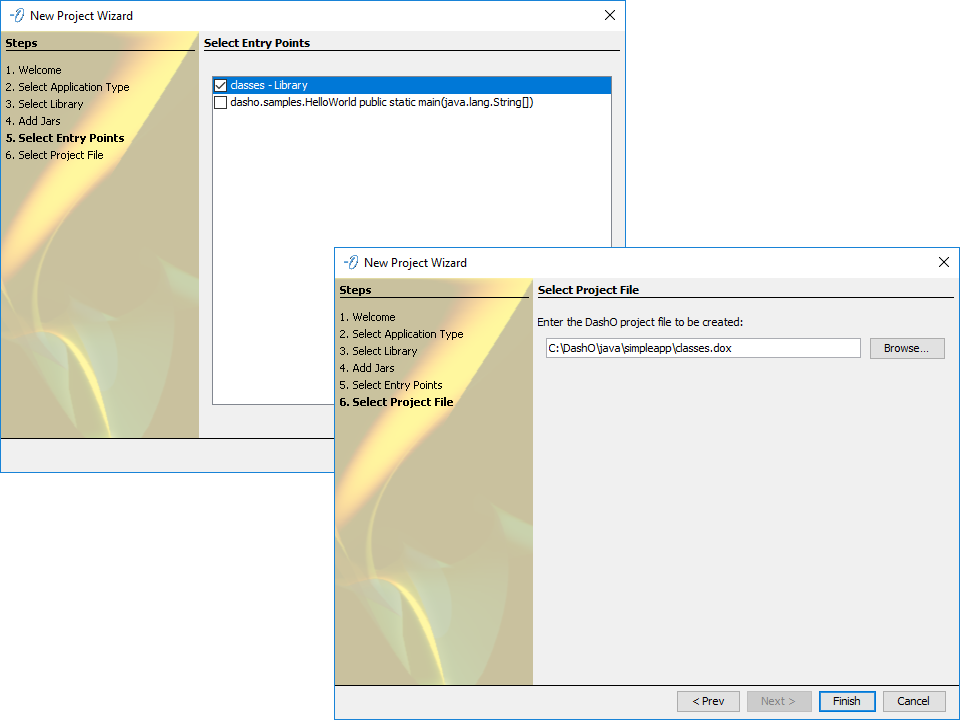
Next the wizard will ask about the entry points in the library. The wizard will show the entire library as an entry point along with any special classes or methods that are used as entry points.
Finally, the wizard asks where you want to save the resulting project file.
If you choose a name that already exists, DashO will ask if you want to replace the file. If you choose to save over the existing project, your new settings will be saved, and a backup will be created of the old project.
Java Applications
When you select an application jar to be obfuscated, the wizard will ask you for the location of the jar that contains the application, as well as the location of the JDK that DashO should use to resolve Java runtime classes (See Include JDK).

The wizard will examine the application and determine dependencies that will be needed at runtime or for obfuscation purposes.
You can add additional jars as input to be obfuscated or as runtime support jars.
Java modules (.jmod) can also be added to the list of support libraries.
The missing classes list shows classes that are referenced by your application but were not located.

Next the wizard will ask about the entry points of the application. If the jar's manifest included a Main-Class attribute it will be listed as an entry point. In addition, the wizard will show the special classes or methods that could also be used as entry points. DashO uses these entry points to determine unused items that will be removed from the obfuscated output. You can select as many entry points you wish to have DashO follow, but should always select at least one.
Finally, the wizard asks where you want to save the resulting project file.
If you choose a name that already exists, DashO will ask if you want to replace the project.
If you choose to save over the existing project, your new settings will be saved, and a backup will be created of the old project.
WAR Files
When you select a WAR file to be obfuscated the wizard will ask you for the location and name of the WAR to be obfuscated, as well as the location of the JDK that DashO should use to resolve Java runtime classes (See Include JDK).
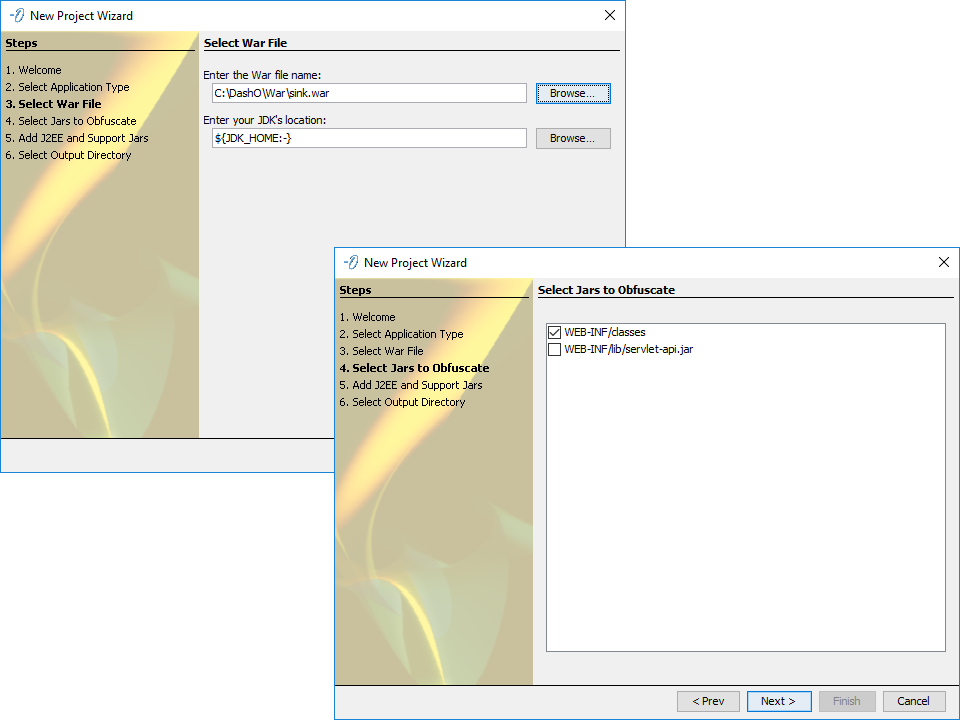
The wizard will examine the WAR file for classes and jars that are included in the WAR. These items include the special locations in WEB-INF that are used by the web container as well as jars that may be referenced by JNLP files. You can select which items in the WAR file that you wish to obfuscate.
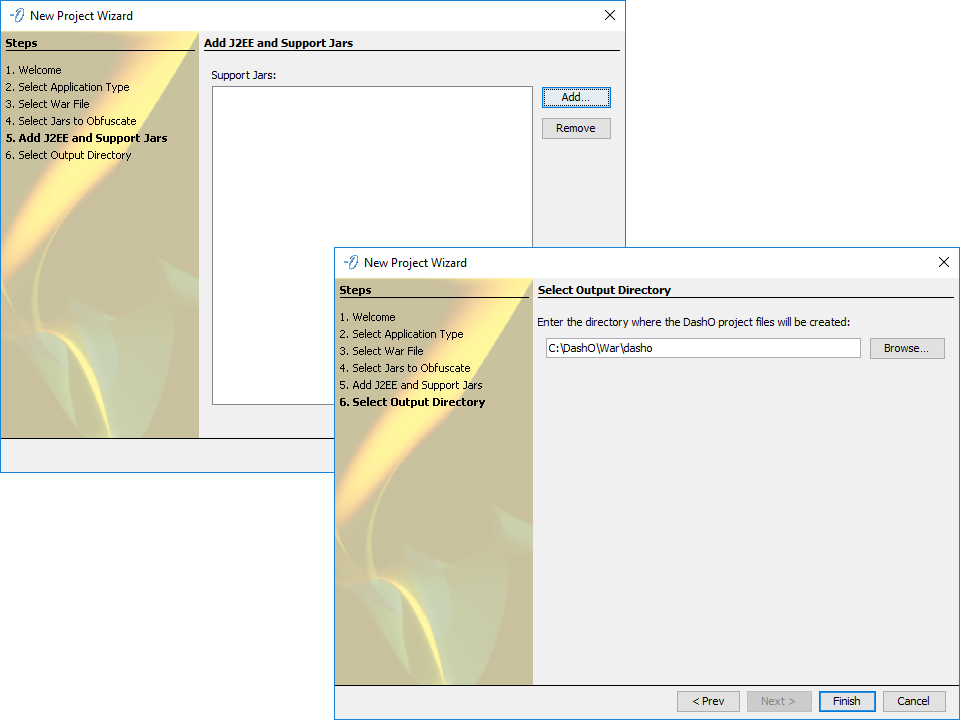
In addition to the jar files that are stored in the WAR file, DashO needs the classes that are part of the Servlet and JSP APIs.
The wizard will look for references to these jars in well-known locations and add them to the list of support jars.
If your application expects the web container to provide any other classes shared amongst web application, such as the logging service log4j, you need to add it to the list of support jars.
Java modules (.jmod) can also be added to the list of support libraries.
Finally, the wizard asks for the directory where you want to save the wizard's output. The wizard will create several files in addition to a project file:
obfuscate.xml: An Ant script that opens the WAR file, runs the DashO project file, and then re-assembles the WAR file.obfuscate.properties: A Java properties file read by obfuscate.xml. Use this file to change location defaults.
The obfuscate.xml file can be executed by running Ant:
ant -f obfuscate.xml
or by calling it from another Ant file:
<ant antfile="obfuscate.xml"/>
It performs three tasks:
It extracts the WAR file into a directory. The default directory is
.unwar.It runs the Wizard generated project files against the contents of the
.unwardirectory. Results are temporarily stored in the.obfusdirectory.It recreates the WAR with the obfuscated results into a new WAR file with
_dashoedadded to the original file name.
Note: The default memory allocated to DashO processes is 192M. You can change this and other defaults used in WAR file processing by editing
obfuscate.properties.
If the project file that you specified already exists, DashO will ask if you want to replace the project.
If you choose to save over the existing project, your new settings will be saved, and a backup will be created of the old project.
You will need to install DashO's Ant tasks to perform the obfuscation. See DashO's Ant Task documentation for additional details.
Android Applications and Libraries
When you select an Android application (APK) or library (AAR) project to be obfuscated, the wizard will ask you for the build environment and the location of the Android project. The process is slightly different between Gradle build environments and direct APK projects.
Note: If obfuscating an Android library (AAR), you must integrate DashO into the Gradle build environment.
Gradle Build Environment
Prerequisites
The prerequisites depend on the version of the Android Gradle plugin being used. See the Version Compatibility chart.
Note:
Please see Working with Build Variants if your project contains product flavors or you want different build types to be configured differently.
The wizard considers a directory to be an Android project if it contains the build.gradle file used by Gradle. If you created your Android project using Eclipse, you will want to migrate it. You should then build your project:
gradlew clean build
Note: Please start with a clean build of your project before running the wizard.
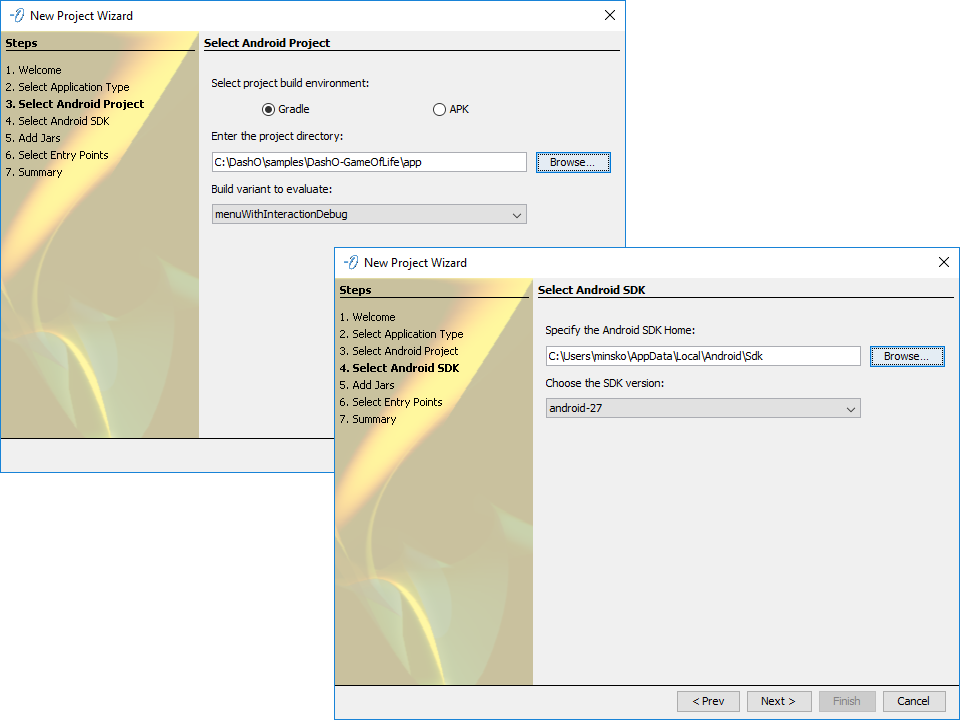
Running the wizard in a directory that already contains source for an Android application or library will not overwrite any of your source files. Once you select the directory containing the project, choose the Build Variant to be evaluated.
The wizard will try to determine the Android SDK Home based on your environment and select the SDK version configured in this project.
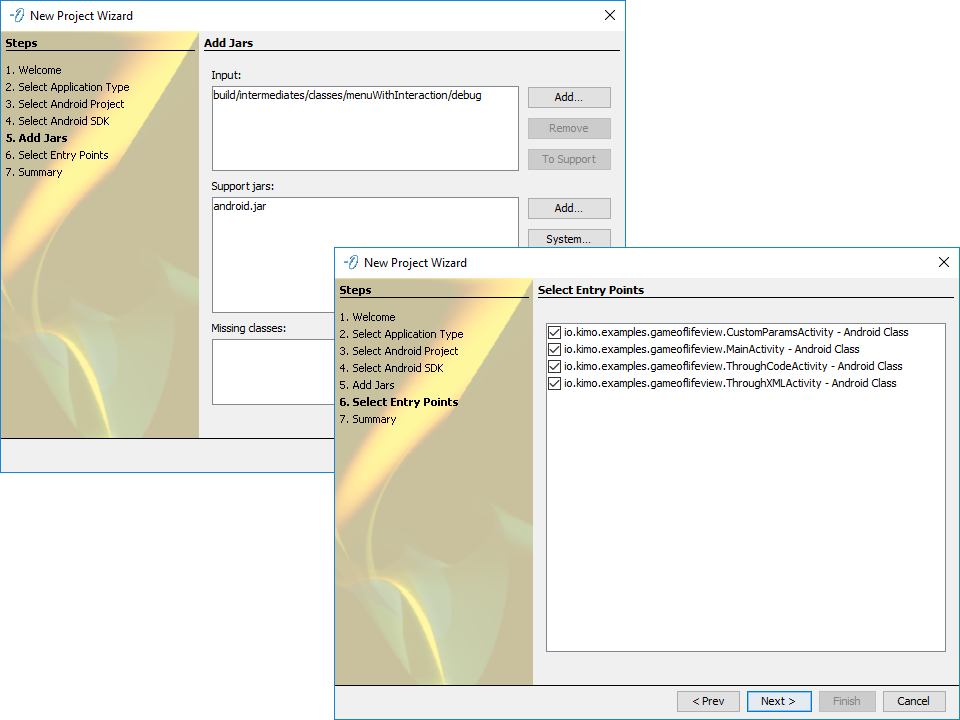
The wizard will examine the project and determine dependencies that will be needed at runtime or for obfuscation purposes. You can add additional jars as inputs to be obfuscated or as runtime support jars. If your Android project uses an add-on target, like Google-APIs, those libraries may not be added automatically as support files. The missing classes list shows classes that are referenced by your project but were not located.
Note: Support jars and libraries can also be added later by adding an
includeAsInputsentry in thedasho.gradlefile. See the DashO Gradle Plugin User Guide for additional information.
The wizard analyzes the AndroidManifest.xml, the resources, and the compiled classes to determine the entry points of the application or library. You may see some entry points unselected, by default. Those are classes referenced by the AndroidManifest.xml but are not compiled by the project itself. If you plan to include the libraries which define those classes as inputs, select them before continuing.
Notes: Android library (AAR) projects may not list any entry points because all public classes and methods will be considered entry points by default, so they don't need to be listed explicitly.
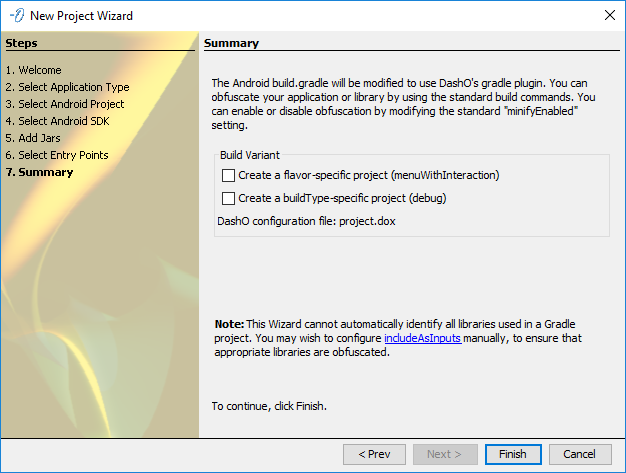
The wizard can generate a generic project or one specific to a product flavor and/or build type. See Working with Build Variants for more details.
Note: This Wizard cannot automatically identify all libraries used in a Gradle project. You may wish to configure includeAsInputs manually, to ensure that appropriate libraries are obfuscated.
The wizard will create/change several files:
project.dox: This is the DashO configuration file, containing all the project-specific settings. This is related directly to the source code of the project. It can be manipulated using DashO's user interface. The name of the file will be different when generating a variant-specific project.build.gradle: This is a Gradle build script. The wizard modifies this file to add dependencies to the DashO Gradle plugin. The modifications include an import of dasho.gradle. This is not project-specific, except that different versions of DashO might make different modifications (as we add new features to DashO).dasho.gradle: This is a Gradle build script piece that is referenced by the main build.gradle. It provides configuration information. It does not have project-specific data in it (except for a possible reference to project.dox), but different versions of DashO might create different versions of this file (as we add new features to DashO). Make sure to use the correct version of the DashO Gradle plugin.
Note: See the Version Compatibility section of the DashO Gradle Plugin User Guide to make sure the correct versions are configured.
If the project file that you specified already exists, DashO will ask if you want to replace the project.
If you choose to replace the existing project, your new settings will be saved, and a backup will be created of the old project.
Building the Project
You can use DashO's user interface to configure obfuscation and check injection, or to attempt obfuscation to investigate any issues or misconfiguration. You may need to manually add required support jars or set them in the gradleSupport User Property. To build and obfuscate the project you should use the standard commands provided by Android's Gradle plugin. Such as:
gradlew assemblegradlew buildgradlew installDebug
By default, debug builds are not obfuscated. See the Enabling Obfuscation section of the DashO Gradle Plugin User Guide for additional information.
Note: Please consult the Android Gradle Plugin User Guide for information on the overall build process.
DashO will rewrite the AndoidManifest.xml file by using the ${AndroidManifestFile} and ${AndroidManifestOutput} entries in the non-class files section.
Working with Build Variants
The wizard works directly with build variants (product flavors / build types), evaluating the specific build variant selected. After the analysis, you choose to create either a generic project to be used by all builds or one specific to a product flavor and/or build type. If any of the following statements are true, you may want to consider using variant-specific projects:
- Your flavors have different
AndroidManifest.xmlfiles which list different Activities, Services, etc. - Your flavors reference different custom view components in their resources.
- You want DashO to obfuscate your
debugbuilds, but have a different configuration than yourreleasebuilds.
If you generate a variant-specific project, you should re-run the wizard to create variant-specific projects for the other variants or exclude them from obfuscation.
Note: See the DashO Gradle Plugin User Guide for more information about integrating variant-specific projects with your Gradle build.
Direct APK Manipulation
Prerequisites
- Android SDK Tools Revision 10 or later.
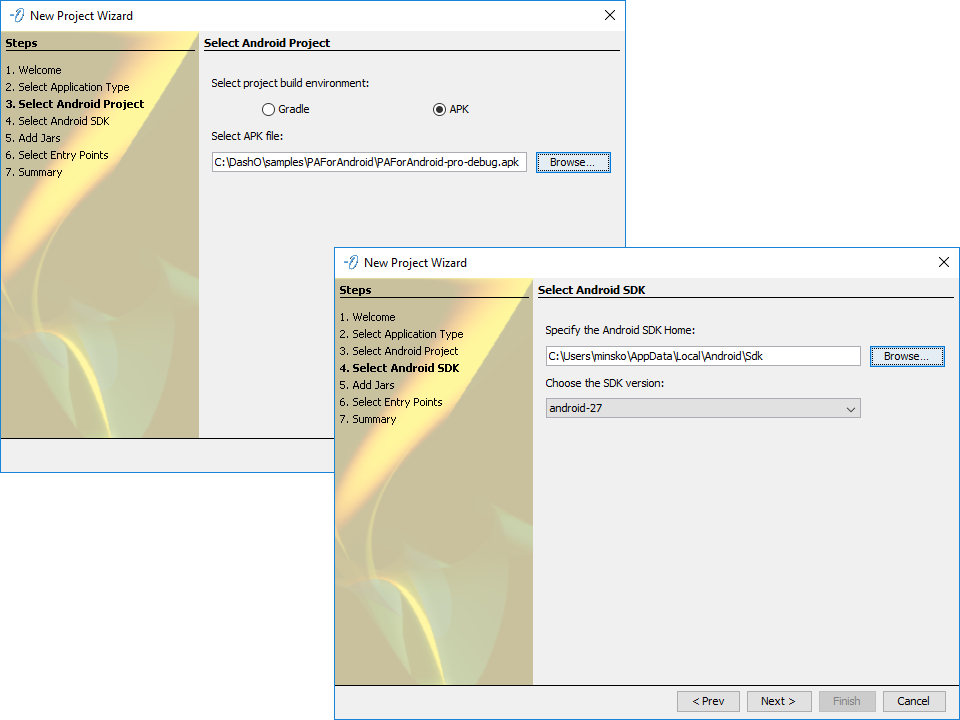
The wizard requires you to select a valid APK file.
The wizard will try to determine the Android SDK Home based on your environment. Select the SDK version used when compiling the APK.
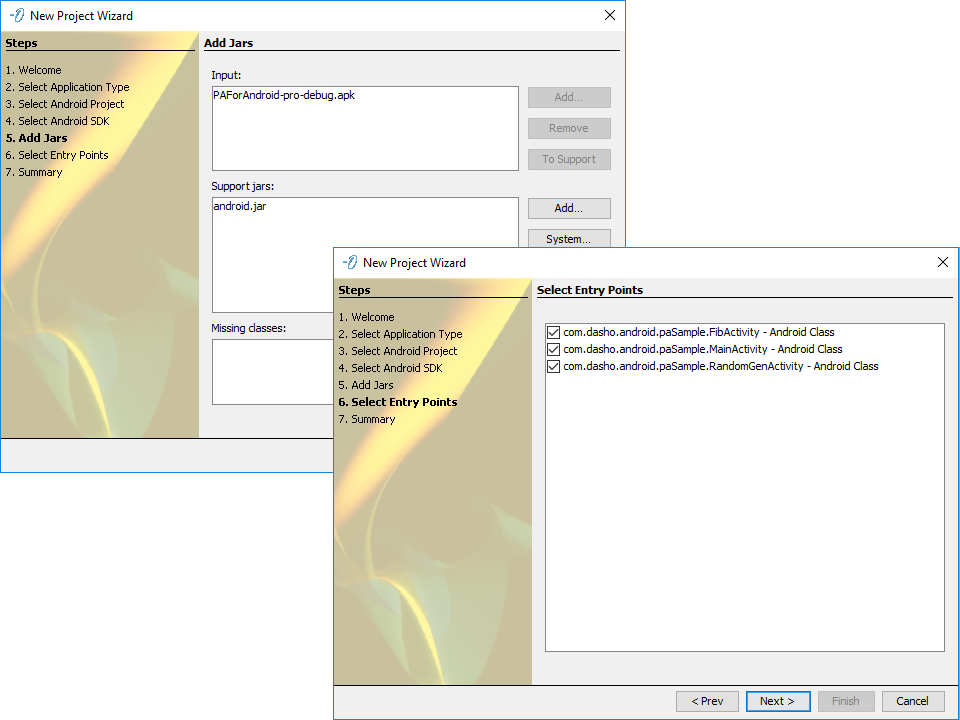
The wizard analyzes the AndroidManifest.xml, the resources, and the compiled classes inside the APK to determine the entry point of the application. For Android applications you should use all the entry points suggested by the wizard.
Note:
If the APK cannot be decoded properly you will see an error on the Add Jars page. Click Cancel and look at the Console for additional details.
The wizard will create a project.dox file. This is the DashO configuration file, containing all the project-specific settings. This is related directly to the compiled code of the APK. It can be manipulated using DashO's user interface.
Note:
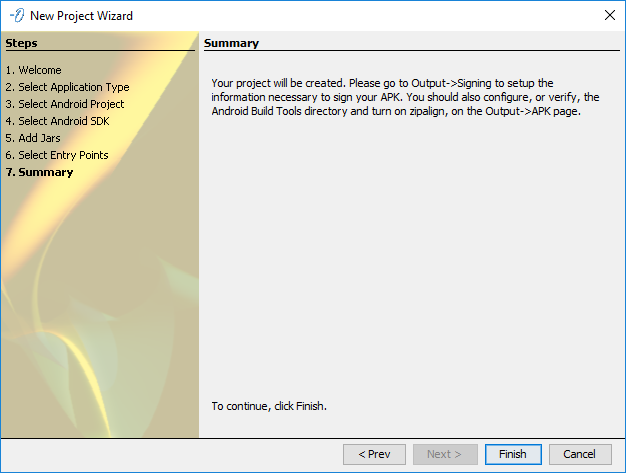
You should configure signing on the Output – Signing screen and configure, or verify, the Android Build Tools directory on the Output – APK screen. The wizard tries to detect the Android SDK'sbuild-toolsdirectory to help with this configuration.
If a project file has already been created for this APK, DashO will ask if you want to replace the project.
If you choose to save over the existing project, your new settings will be saved, and a backup will be created of the old project.
Building the Project
Use DashO's user interface to configure and run obfuscation and check injection. DashO will rewrite the AndoidManifest.xml file to allow for the renaming of classes. A new APK file will be output.
Note:
You may want to configure signing and turn on zipalign so the output APK is ready to be installed.